
Best Display Case Lighting for Anime Figures: LED Placement Tips for Better Shelf Presence
For most anime figure display cases, LED strips placed along the front upper edges or upper side channels create cleaner visibility than a single harsh top light, especially when glare control matters. For shoppers exploring this further, see display cases for anime figures. The best display case lighting for anime figures makes sculpt detail easier to read, preserves paint contrast, and improves shelf presence without blasting the glass with reflections.
Quick Answer: Best LED Placement Zones
If you want anime figures to look brighter, cleaner, and more dimensional inside a case, start with these placement zones:
- Front upper edge lighting for the most balanced everyday visibility.
- Upper side channel lighting when you want stronger sculpt definition and less flat front light.
- Soft back accent lighting only as a secondary layer for depth, not the main light source.
- Avoid a single centered top strip by itself if your case has glass or acrylic panels that easily reflect glare.
For most collectors, the safest default layout is this:
- one LED strip along the front upper lip of the case
- or two softer strips along the upper left and right side edges
- angled slightly inward instead of straight down whenever possible
That placement helps LED strips, display case lighting, and glare work together in a way that improves anime figures rather than washing them out. A good layout makes faces, paint transitions, and small sculpt cuts easier to see. A bad layout makes the shelf look bright while the figure itself looks flatter.
Placement Guide: Where LEDs Should Go in a Figure Display Case
Think about lighting in layers instead of asking whether top, side, or back lighting is “best” in isolation. Placement matters because the case material, shelf depth, figure pose, and paint finish all change how the light lands.
Front Upper Edge Lighting
This is usually the best first upgrade for a standard anime figure shelf lighting setup.
Why it works:
- sends light toward the front of the figure where most detail is viewed
- reduces the cave-shadow effect inside deeper display cabinets
- keeps faces and torso details visible without forcing a hard overhead beam
- usually creates better shelf presence than a single rear or center strip
This layout works especially well for:
- upright scale figures
- prize figures with simpler poses
- shelves where viewers mainly look from the front
- cases with doors that are prone to direct reflection from a ceiling light
Best practice: keep the strip slightly recessed so the LEDs themselves are not directly visible when you stand in front of the case.
Upper Side Channel Lighting
If your main goal is better dimension, side placement is often stronger than a basic top-lit setup.
Why it works:
- reveals folds, hair strands, armor edges, and layered clothing better
- gives more shape to figures with dramatic posing
- reduces the “flat face, bright head” problem created by harsh vertical light
- can lower direct glass glare when the beam is not aimed straight forward
This layout is strongest for:
- dynamic poses
- darker paint schemes
- figures with deep sculpt detail
- collectors using taller cases where a top strip alone feels distant
The tradeoff is that side lighting can create stronger contrast. If one side is much brighter than the other, the figure may look uneven rather than dramatic.
Soft Back Lighting
Back lighting is useful, but it should almost never be your only light source.
It helps by:
- separating the figure from the background
- improving silhouette definition
- adding a more premium display cabinet lighting feel
- giving translucent hair, effects parts, or clear accessories some extra life
It hurts when:
- the figure turns into a silhouette from the front
- glossy paint catches too much edge glare
- the shelf background becomes brighter than the subject
Use back lighting as an accent layer, not the main visibility layer.
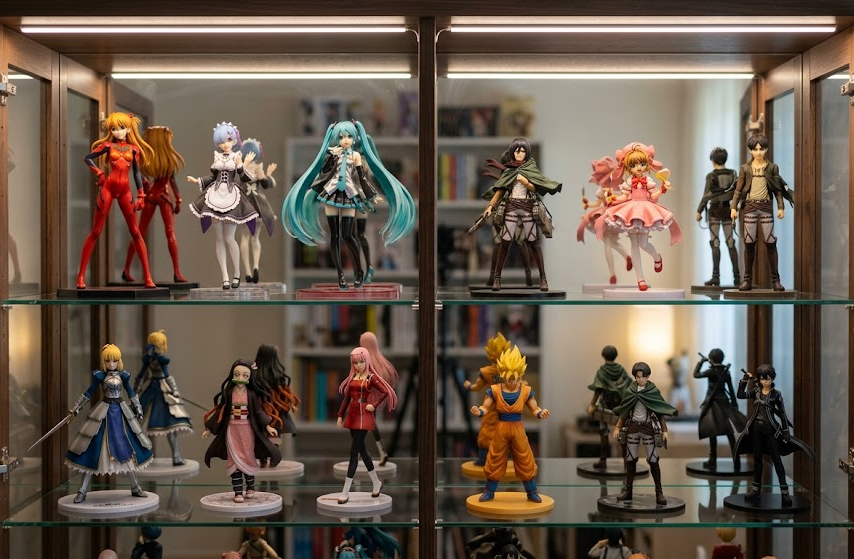
Top, Side, and Back Lighting Compared
| Placement | Main Benefit | Main Risk | Best Use Case |
|---|---|---|---|
| Front upper edge | Balanced front visibility and cleaner faces | Can still glare if the strip is too exposed | Most standard anime figure cases |
| Upper side channels | Better dimension and sculpt detail | Uneven lighting if one side dominates | Dynamic poses and detailed sculpts |
| Single top center strip | Easy to install | Can flatten paint and create forehead glare | Only for quick low-effort upgrades |
| Rear accent strip | Adds depth and separation | Can silhouette the figure | Layered lighting with a front source |
If you are choosing only one layout, front upper edge or upper side placement usually beats a single centered top light. That is the simplest answer to most display case lighting placement questions.
How to Avoid Glare on Glass or Acrylic Panels
Glare is usually a placement problem before it is a brightness problem.
Use these fixes first:
- recess the LED strip behind the case frame or lip
- angle the strip slightly inward rather than directly at the door panel
- avoid placing the strip exactly where your eye line catches the diode reflection
- use diffused channels instead of fully exposed bare LEDs when possible
- reduce the number of visible hot spots instead of just lowering brightness
The relationship is straightforward:
- exposed LED + direct line to glass = stronger visible glare
- diffused channel + recessed placement = softer reflection control
- brighter light in the wrong angle = worse display even if the shelf feels more illuminated
If your case uses acrylic instead of glass, the same logic still applies, but acrylic often shows haze and reflection patterns more aggressively. That makes strip concealment even more important.
Quick Glare Checklist
Before you peel and stick anything permanently, test these points:
- Can you see the LED dots directly when standing in front of the shelf?
- Does the glass reflect the strip itself, or only the light cast on the figures?
- Does the face of the figure stay visible from normal viewing height?
- Does the door panel show a bright horizontal line before you even notice the figure?
If the answer to any of those is yes, change the angle or placement before increasing brightness.
Warm vs Cool White for Anime Figures
The best color temperature depends on what you want the paint to do.
Neutral to Cool White
A range around neutral to slightly cool white often works best for anime figures because it keeps whites crisp and makes modern paint applications look cleaner. For shoppers exploring this further, see do LED lights damage anime figures.
Best for:
- blue, white, silver, and black-heavy color schemes
- futuristic or sharp mechanical designs
- shelves where you want a cleaner showroom look
Risk:
- too cool can make skin tones feel sterile
- glossy surfaces can look harsher under aggressive cool light
Warm to Soft Neutral White
A warmer light can make certain figures feel richer and less clinical.
Best for:
- softer fantasy characters
- cream, red, brown, and gold-heavy palettes
- shelves with wood tones or warmer room lighting
Risk:
- too warm can yellow white costumes and flatten cool-toned paint contrast
- pale faces may lose some crispness if the shelf already has a warm ambient environment
For mixed collections, neutral white is usually the safest compromise.
Lighting by Figure Color and Paint Style
Different figures react differently to the same strip placement.
Dark or High-Contrast Figures
These often benefit from upper side lighting because it pulls out edge definition and prevents the sculpt from disappearing into the case.
Pale Figures With Soft Shading
These usually look better with gentler front upper edge light. Too much side contrast can make the face look patchy or over-modeled.
Metallic or Glossy Finishes
These need stricter glare control. Visible hotspots are more distracting on reflective armor, glossy boots, or polished accessories than on matte clothing.
Translucent Hair or Effect Parts
A mild rear accent can help these parts glow a little without turning the whole display into a backlit silhouette.
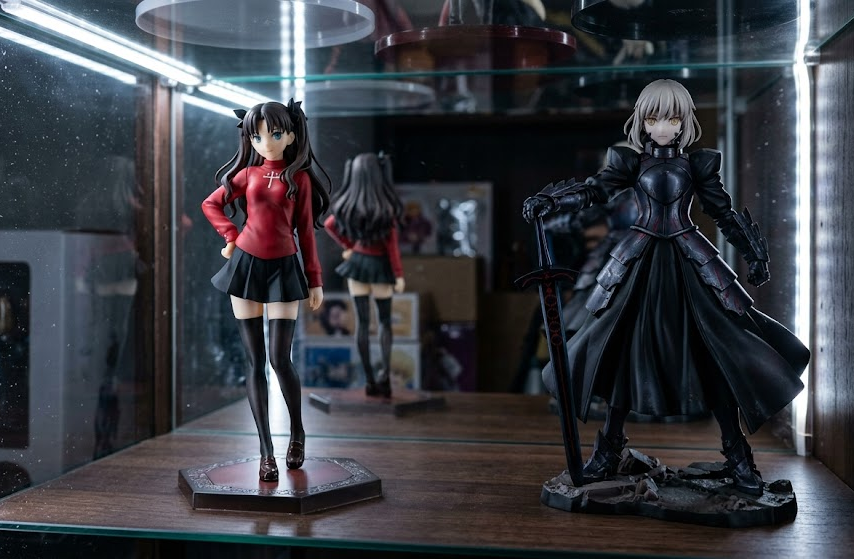
Mistakes That Flatten Sculpt Detail
These are the most common anime figure LED lighting tips collectors learn the hard way:
Using One Harsh Top Light for Everything
This is the fastest way to make different figures all look equally flat. It brightens the shelf but often removes the sense of depth from hair, sleeves, layered skirts, and accessories. For shoppers exploring this further, see display cases.
Treating Brightness as the Same Thing as Quality
More light does not automatically mean better shelf presence. Smart placement usually improves results more than raw brightness.
Exposing Bare LED Dots in the Viewer’s Line of Sight
Once you notice the strip itself more than the figure, the setup is doing the opposite of what display case lighting should do.
Ignoring Shelf Depth
A shallow case can tolerate simpler top placement. A deep cabinet often needs front edge or side placement so the light actually reaches faces and torso details cleanly.
Simple Upgrade Paths for Existing Display Cases
You do not need to rebuild the whole cabinet to get better results.
Easiest Upgrade
- move a top strip forward toward the front edge
- hide it slightly behind the frame
- test glare before fixing it permanently
Better Upgrade
- split one strong strip into two softer side or edge runs
- use diffusers to reduce visible hotspots
- adjust brightness after placement, not before
Best Practical Upgrade for Most Collectors
- use a front upper edge strip as the primary source
- add mild side lighting only if the sculpt still looks flat
- reserve back accent lighting for shelves with darker backgrounds or translucent parts
This approach gives the cleanest balance of visibility, reflection control, and shelf presence without overcomplicating the install. For shoppers exploring this further, see best LED lighting for action figure displays.
Summary Takeaway
The best display case lighting for anime figures usually comes from LED strips placed along the front upper edge or upper side channels, not from one harsh top light in the middle of the shelf. If you want better anime figure shelf lighting, focus on placement first, glare control second, and brightness last.
FAQ
Where should LED lights go in a figure display case?
For most cases, place LED strips along the front upper edge or upper side channels so light falls onto the figure instead of straight into the glass. That usually gives better visibility and less glare than a single centered top strip.
What color LED is best for anime figures?
Neutral white is usually the safest choice because it keeps paint colors readable without pushing the shelf too warm or too blue. Warmer light can work well for softer palettes, while cooler light suits sharper or more mechanical designs.
How do you avoid glare in a glass display case?
Hide or recess the strip, angle it inward, and use a diffuser when possible. The goal is to stop the viewer from seeing the LED dots or their direct reflection in the panel.
Do LED strips make anime figures look better than overhead lights?
Usually yes, because LED strips inside the case let you control placement much more precisely. Good strip placement improves sculpt detail and shelf presence more reliably than a generic overhead room light.